Hiking Backpack Fitting Guide

The fit of your rucksack can literally make or break a hiking trip. While an ill-fitting pack can make 20kg feel more like 40 and even give you pressure sores, a great fitting pack can make you feel like you are carrying half the weight you actually are as well as giving your hips and overall body more mobility, agility and freedom of movement. The good news is that great quality packs have a tonne of adjustability and if you put in a little effort to get it write your body will thank you for it later. Follow the steps below to check if your bag fits correctly. This is very important for larger day packs (>40L) and hiking packs where you are carrying a significant amount of weight on your back. A well-fitting pack should be suitable for your back (torso) length, and focus most of the weight on your hips.
Rucksack Sizing
Hiking packs either come in different sizes, or are fully adjustable to accommodate most body shapes and sizes. Getting the correct size for your torso length is vital for a pack to fit properly and comfortably. The first step is to establish your torso measurement using a tape measure. We are looking for the length between the bony protrusion of the C7 vertebrae (below the neck with the head down) and the top of the hip bones. Once you know this bit of information, you can then choose the appropriate size depending on the manufacturer’s recommendations, or adjust the harness length to suit.
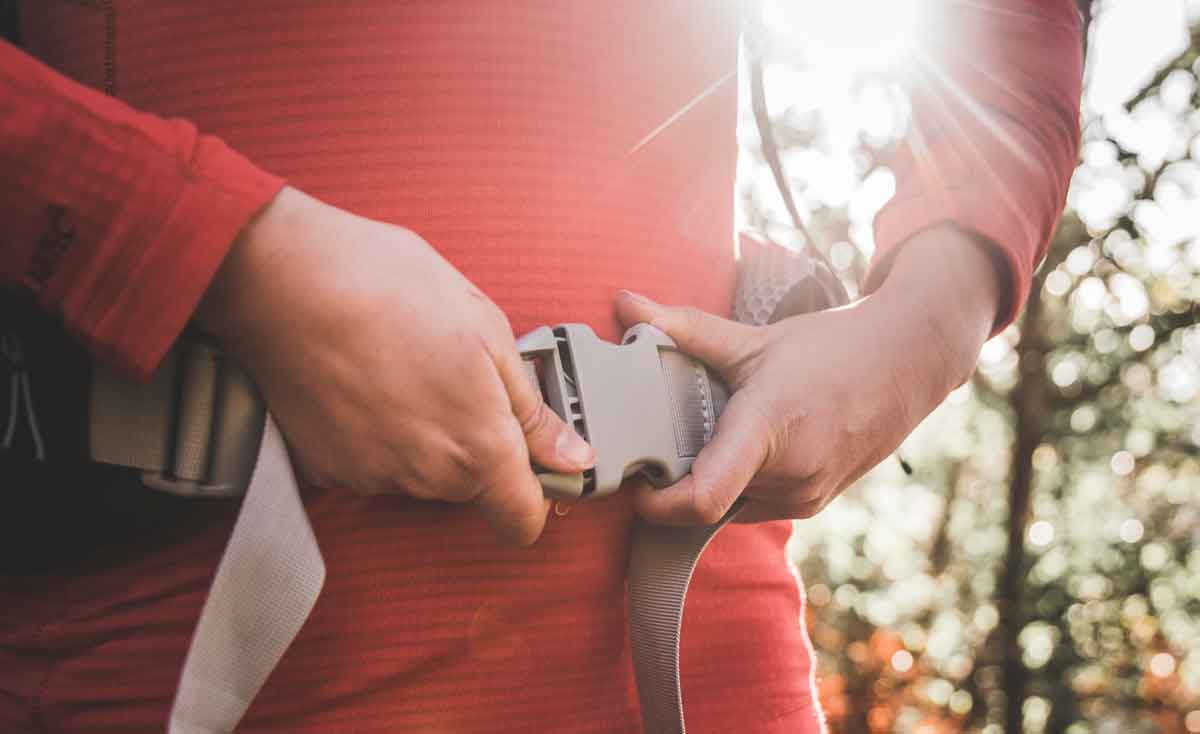
The Hip Belt
Locate the top part of your hip bones with your fingers. The hip (Iliac crest) will support most of the weight of the bag. Fill the bag with the weights, and distribute it evenly in the bag. The idea is to get the feeling of a fully loaded bag. Put the bag on and let it hang loosely from your shoulders.

Fasten the hip straps, at same level as, or over the top of your hip bone. You might need to adjust the shoulder straps to get the right alignment onto the hip bones. Make sure that the hip straps are pulled tight after adjustments were made so that it feels secure around the hips and they are supporting a significant portion of the pack’s weight.

Shoulder straps
Once the bag is positioned on your hips correctly, the next step is to get your shoulder straps to sit flush against the back of shoulders as shown in the picture. The rest of back system should then follow your back contour. The shoulder straps should continue from the highest point of your shoulder down your back two to three inches before joining into the harness of the pack.

Adjust the Back Length
You may need to extend or shorten the back length on the harness if you don’t get the flush fit across the back of your shoulders. It might take a few adjustments to get the right fit. If you are using a bit of trial-and-error and adjusting the back length a few times to get it right, be sure that you hip belt is always at the same point on your Iliac crest every time you put it back on for consistency.

Extra Straps and Features
Load stabilising straps are the two thin straps that sit above shoulder straps. Tightening these straps, will pull the bag closer to your back, and loosening it will shift the weight away. Beware of over tightening these as they will lift the shoulder strap off your shoulders, altering the fit.

The chest strap goes across your chest and is designed to stop movement of the shoulder straps as well as hold the straps slightly away from your arm pits to stop rubbing. They are adjustable to various heights, with the best position being in line with the arm pits. The strap should be firm, but not pulled too tight, otherwise it will pull the shoulder straps out of proportion.

Final Back Pack Fit
If you have done everything correctly the bag should touch and follow the contour of your body right from the hip belt and the pad that goes in the small of your back, up your spine to your shoulders, continuing with the shoulder straps over to your chest. A great fitting pack for general hiking will carry about three quarters of the weight on your hips and a quarter on your shoulders. The load on your hips should be evenly spread from the small of your back right around as far as possible pas the hipbones at the front. Likewise the shoulder straps should spread the load evenly over the whole length of shoulder strap from the upper back, to the top of your shoulder, down to the chest.
All in all, a good fitting pack is one that spreads the weight of the pack over as much of the contact area with your body as possible. A bad fitting pack concentrates the weight of your pack only on a few points.
Packing your Hiking Pack
Loading your pack correctly is all about getting the right weight distribution throughout the bag, making it more comfortable to carry. The aim is to make your pack more ergonomic to carry which will make it feel lighter and also make you feel more agile. When packing, also consider accessibility to equipment inside your bag, especially for frequently used items, and emergency gear.
If your bag is packed properly it will stand upright on the floor or maybe fall slightly toward the harness when put down. If the pack falls forward (away from the harness), then it is weighed too much in the front of the pack, which will feel like your bag is dragging you backwards while walking. Not ideal when going uphill! The same applies if the pack leans to a specific side, then there is too much weight towards that side, and will make you feel uneven and uncomfortable during the walk. For general hiking the idea is to get the bulk of the weight up higher in your pack more in line with shoulders. This will shift the centre of gravity of your body and pack combined up around your chest height which, when leaning forward walking, will position the weight over your toes and aid in forward motion. For more technical endeavours like mountaineering or even technical scrambling, it might be better to position the weight lower down in the pack as this will stop if feeling top heavy and unstable and make you feel more secure on your feet.
Here are some packing tips:
- Place soft, light items like sleeping bags, mats or clothing at the bottom of your pack. This will prevent weight accumulating at the bottom and make the pack too bottom heavy. It will also shift most of the pack weight towards your spine.
- Pack heavier and bulky equipment in the middle of the bag, on the harness side, close to the centre of your back, to allow most of the weight to settle on your hips. Gear that you would pack here is your tent, water bladder, cooking equipment and food.
- Use clothing and towels to fill the space in the front, middle section of the pack.
- The top of the pack is the most accessible, and where you would place essential stuff such as snacks, fleece, wet weather gear, hat and first aid kit.
- Small personal items can be stashed in the top lid, and other organisational pockets on the pack, such the front, hipbelt and water bottle pockets.
- Store and protect clothing, sleeping bag and sleeping mat in waterproof dry bags.
- Attach bulky equipment to the outside of the bag using tie-down straps. These might be a large sleeping mat that doesn’t fit inside your pack, tent poles etc.

If you take the time to adjust your pack correctly and pack it with weight distributed in the most ergonomic and practical way your hips, back, shoulders and overall body will love you for it. Often it takes time to really dial in the best way to pack your rucksack and it’s great to learn and experiment with this on a multiday hike. If you need further assistance with this topic, don’t hesitate to get in touch with us via 02 9264 5888 or email at web@mountainequipment.com .
Written by: Hannes Petzer & Sheila Alexander